Webhooks are user-defined callbacks that inform other applications or websites about events happening on your SuperSaaS account in near real-time. They can be used to extend the functionality of your schedule, for example, by subscribing new users to a mailing list or by sending you a chat message for a changed appointment.
Automatically configuring webhooks
You can use either Zapier.com, Make, Pipedream or self-hosted n8n to interactively create webhooks between hundreds of well-known websites and SuperSaaS, without the need for programming. It’s also possible to set up webhooks programmatically using the REST hooks protocol.
Read more: Automatically configure webhooks using Zapier or Make. For n8n, follow the instructions on how to install the SuperSaaS n8n community node: n8n-nodes-supersaas.
Manually configuring webhooks
Please note that this feature is only available to subscribers. You can try it out for a week by clicking the button “Start free trial” on the webhooks screen.
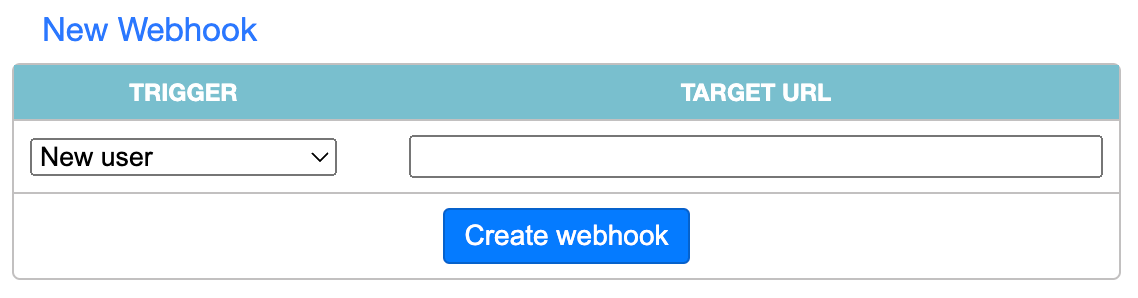
You can manually create and update webhooks via the Integrations page, where you can find the Webhooks button. A webhook sends data, so it requires that a web service is available on the other side to receive the data. Typically, the other side is a script or application that you create, but it can also be a third party website that the webhook connects to. If a message transmitted by our webhook requires some processing before it can be consumed by another API then the service Pipedream can be very useful. A powerful feature of Pipedream is that you can store the webhook messages and query them using SQL, allowing you to build custom reports without the need to set up a database backed script yourself.
Creating a webhook without the use of Zapier or Make requires some technical proficiency. The remainder of this page contains information for programmers looking to add a webhook to send information to their own application, or who want to program their own interface between SuperSaaS and another site.
Customizing the message that a webhook sends
By default, a webhook sends all relevant fields encoded as JSON. If an object has an attached custom form then that form is also included. You can modify the webhook this to send no data at all, or to send data you specify. For example, you may want to include an API key or authentication string in the message.
After you create a new webhook you will automatically arrive at a screen where you can edit the contents of the “payload”, the message the webhook sends. If you click you will see a JSON editor that allows you to add and remove specific fields. The bottom of that screen lists all available “magic words” that will be replaced with relevant content when the message is generated. The magic words change depending on the fields that are enabled for that object.
Testing a webhook
You can find a Test webhook link on the screen where you edit the webhook. On the test screen you can fire off a hook manually and modify the outgoing message. This allows you to modify an outgoing call to mimic, for example, a failed payment without actually having to generate such an event on your schedule.
A good website to help you to debug a webhook is Request Bin. The service supplies you with a link that you can use as the target URL so you can monitor exactly what data is being sent across. If you’re using a service like Pipedream then you can inspect incoming hooks directly in their application.
The test message should fire within five seconds after it has been created. If the receiving side responds with a status code that is not “OK” (status code outside the range 100 to 300) then the message will be attempted again at increasing intervals. After 10 failed delivery attempts, the message will be deleted. If a hook has more than 5 failed messages it will become inactive until manually reactivated on the webhook screen. If the receiving end replies with a “410 Gone” status code then the webhook will be removed right away.
Active message queue
You can view the progress of webhooks that are being executed on the Active Message Queue screen. The message queue screen will indicate the next attempt for the message and clicking on the spyglass icon will show the contents of the message. It also allows you to remove jobs to prevent them from being retried by clicking the red cross.
List of supported triggers
There are many different events that you can monitor. Some events can be monitored either for a “new” event, or a “changed” event. The “changed” event includes every change, so it also fires on “new” and “delete”. So if you configure both a “New user” and a “Changed user” then both hooks will fire when a new user signs up. Note that if you’ve configured your schedule to not require signup then you would never see a “New user” trigger, only a “New appointment” trigger.
| Trigger | Caused by… | Code |
|---|---|---|
| New user | Fires when a user registers for your account | U |
| Changed user | Fires when the user updates his registration information, or the administrator does it for him. | M |
| New appointment | Fires when a user, or the admin, makes an appointment on the specified schedule. | N |
| Changed appointment | Fires on all possible changes to an appointment, including “New”, “Delete”, “Placement from waiting list”, “Payment received”, etc. (See the full list below) | C |
| New stand-alone form | Fires when a stand-alone form is filled out. Note that it does not trigger when a form is attached to an appointment, instead that would trigger the appointment webhook. | S |
| Updated stand-alone form | Fires upon any change to a stand-alone form (integrated forms would trigger a “Changed appointment” or “Changed user”) | O |
| Send mail | Fires on all emails sent from your account, including “Lost password” mails etc. Useful to send mail through your own server. Email will no longer be sent by us if this webhook is active. More information. | H |
| Reminder | Fires on Reminders. The reminder will no longer be sent by us if its webhook is active. | R |
| Follow-up | Fires on Follow-ups. The follow-up will no longer be sent by us if its webhook is active. | F |
| Purchase | Fires when a user buys something in your shop. Also fires if you create a purchase manually, the price field will be zero in that case. Does not fire for the administrator unless he/she is acting as a user. | P |
Event and role fields
You may want to filter events, for example, to only send a message if an appointment is deleted by a user and not by the administrator. The “event” and “role” fields included in the default fields can be used to construct such a filter, see the tables below for the possible values these fields can contain.
| Trigger | Possible values of the “event” field |
|---|---|
| New user | new |
| Changed user | new, change, delete |
| New appointment | create |
| Changed appointment | create, edit, place, pending, destroy, restore, approve, revert |
| New form | new |
| Changed form | new, change, delete, restore |
| Reminder | reminder |
| Follow-up | follow_up |
| Purchase | purchase |
| “Role” field | Who triggered the event… | |
|---|---|---|
| 0 | Anonymous | Not logged in |
| 1 | Logged in with a shared password | |
| 2 | Validated using an IP range check | |
| 3 | Regular user | |
| 4 | Superuser | |
| 5 | Administrator or Reseller | |
| 7 | System or Payment gateway | |
Status field
When creating or changing an appointment that includes payment, the fields “status” and “status message” allow you to further narrow down to specific events using the list of all possible status codes. For example, you could set a filter to only act on messages for appointments that have been refunded.
Adding authentication to a webhook
Sometimes the receiving end requires that you add authentication to the webhook. Two types of authentication are supported, “Basic authentication” and “Bearer tokens”. You can add basic authentication to the webhook URL by specifying it in this format:
https://username:password@www.example.com/endpoint
To add a bearer token use a similar format, with the username “bearer” and the token as the password:
https://bearer:abc123@www.example.com/endpoint
Using different HTTP methods
By default, a webhook uses a POST request to send the payload. If you need to use a different method, like PUT or HEAD, you can do so by adding a _method parameter in the query string. For example:
https://www.example.com/endpoint?_method=PUT
The _method parameter will be removed from the request and the given HTTP method will be used with the resulting URI.
Programmatically creating webhooks (REST hooks)
To create a webhook via an API call you can send a POST request:
https://www.supersaas.com/api/hooks
| Parameter | Value |
|---|---|
account | Account name (not your email address) |
api_key | Find your API key on the Account Info page |
event | Single character code for the event you want to subscribe to, see first table above |
parent_id | Depending on the event this is a Schedule ID, Form ID or Account ID |
target_url | URL that the webhook should POST to |
For event codes U, M, H and P, the parent_id is the Account ID which you can find on the Account Info page. For the other events the parent_id can be found on the configuration page of the schedule (N, C, R and F) or form (S and O), the ID is the number at the end of the URL.
If the call to create a webhook is successful, the API will return a 201 status code with a JSON body that contains a Webhook ID.
Deleting a webhook
You can delete the webhook programmatically by sending a DELETE to the endpoint with the following parameters:
| Parameter | Value |
|---|---|
id | Webhook ID obtained when creating the webhook |
parent_id | Must be identical to the parent_id used when creating the webhook |
account | Account name (not your email address) |
api_key | Find your API key on the Account Info page |